One Gateway, Zero Trust: How We Gave Internal Services a Controlled Public Face
Note: Internal service names used throughout this post are illustrative.
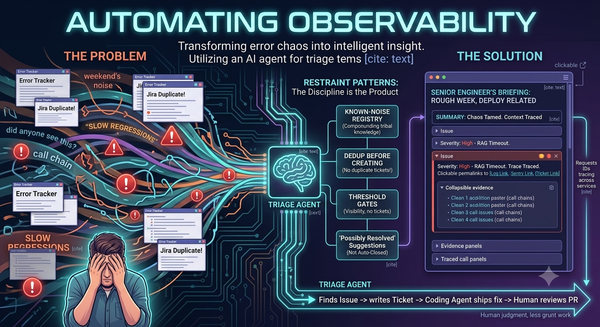
The Problem
We have a lot of internal services. As ZenBusiness's platform grew, so did the ecosystem of microservices powering it — each owning a defined slice of the business. That's the right architecture for us; but it left a gap. There was no clean, secure way to expose any of it to external clients.
The need was real and a business limitation. Without a standardized way to grant controlled external access to internal services, it was a problem that kept coming up and going unsolved.
This work fills that gap.
The Idea
The solution we built is an authenticated API gateway — a controlled entry point that sits in front of our internal services and enforces a consistent auth and permission model before any request gets through.
The core of it:
- External clients authenticate using OAuth 2.0's Client Credentials flow — a machine-to-machine pattern designed for service-to-service communication, with no user login involved
- Every token carries embedded, domain-scoped permissions that define exactly what the bearer is allowed to do
- The gateway validates tokens, checks permissions, and routes authorized requests — or rejects them cleanly
One entry point. Every request goes through the same checks. No exceptions, no side doors.
How It Works: The Two-Phase Flow
Every interaction with the gateway follows two distinct phases: getting a token, then using it.
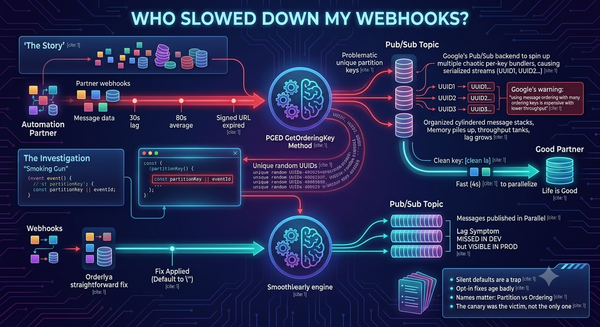
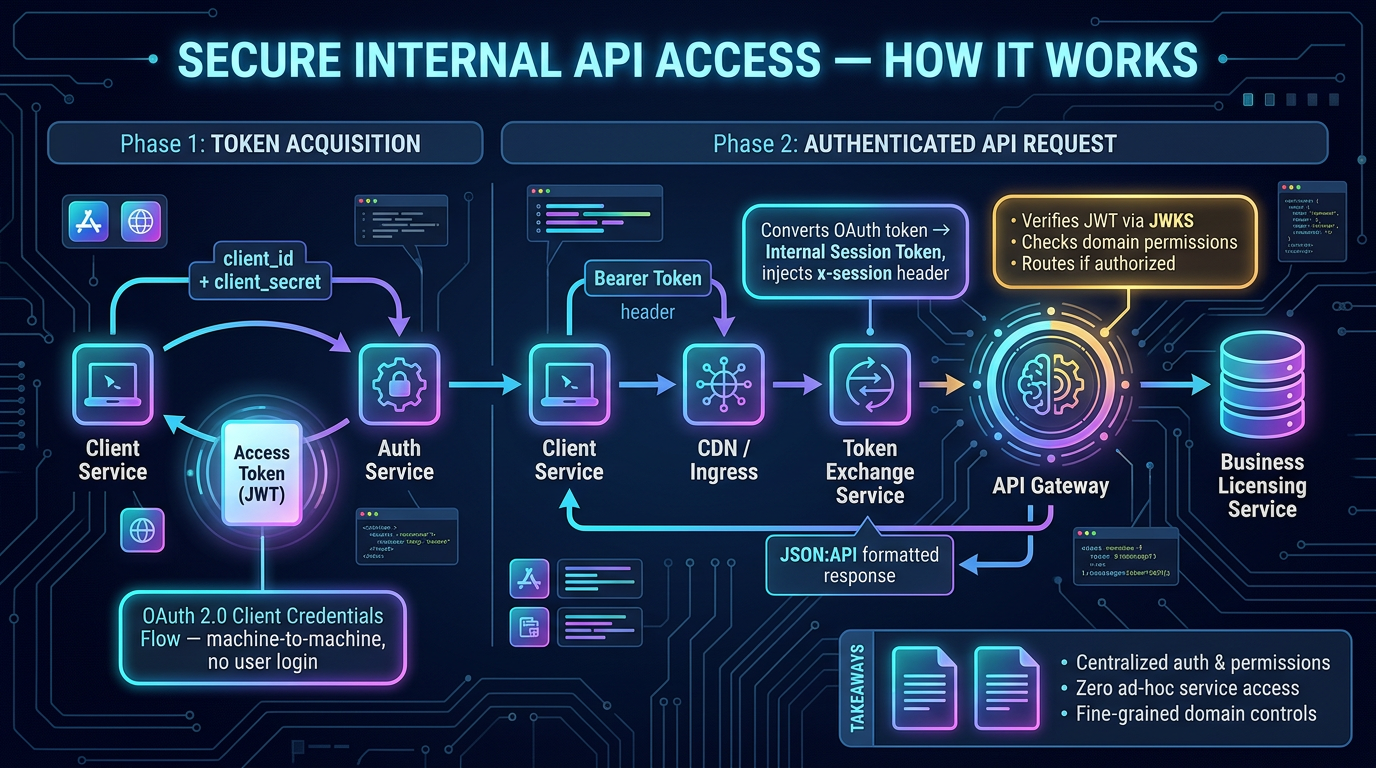
Phase 1: Token Acquisition
Before making any API call, the client service requests an OAuth access token from the auth-service using its client_id and client_secret. The auth-service validates those credentials and returns a signed JWT — a JSON Web Token — containing the client's identity and a set of permission claims. This token has a finite lifetime and must be refreshed periodically.
Phase 2: The Authenticated Request
The client attaches that token as a Bearer header and sends its request. From there:
- The request passes through the CDN and ingress layer
- A token exchange service intercepts it, validates the OAuth token, converts it to an internal session token, and injects it as a request header
- The api-gateway receives the request, verifies the session token against its published JWKS (JSON Web Key Set), extracts the permission claims, and checks them against what the requested route requires
- If the client is authorized, the request is forwarded to the appropriate backend — say, the business-licensing-service. If not, it's rejected with a clean 401.
The response comes back through the gateway, normalized to a JSON:API compliant format, and returned to the client.
The token exchange step deserves a callout. Rather than having the gateway manage two completely different token types — external OAuth tokens and internal session tokens — a lightweight service sits in between that handles the translation. The api-gateway only ever sees internal session tokens; it doesn't need to know or care that an OAuth token started the chain. That separation keeps the gateway's responsibility clean and makes the auth model easier to reason about end-to-end.
The Permission Model
The authentication layer — OAuth, JWTs, JWKS — is well-trodden territory. The more interesting design decision lives in the permission model.
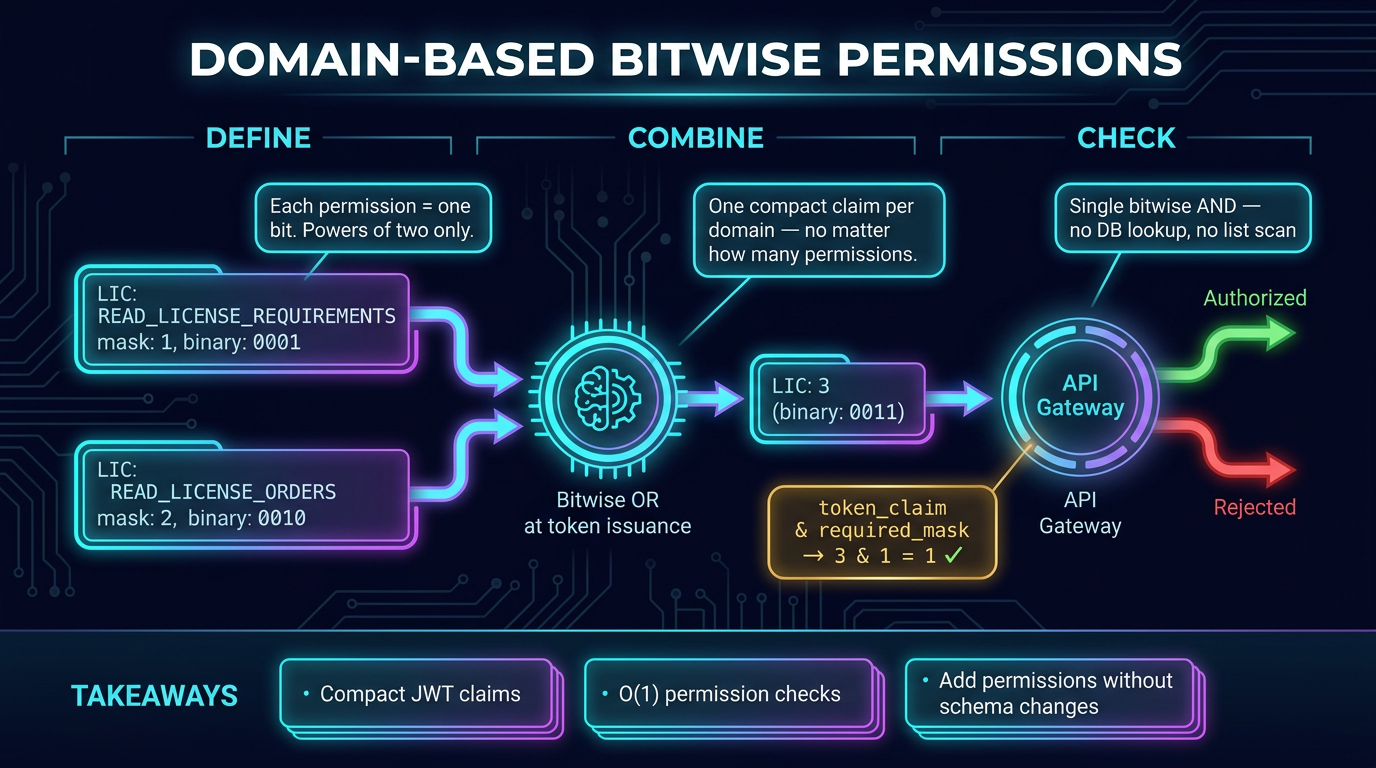
We use a domain-based bitwise permission system. Every permission belongs to a domain — a logical grouping that maps to a slice of the business. Within a domain, each individual permission is assigned a bitwise mask: a power of two (1, 2, 4, 8...).
When a client is issued a token, its permissions are stored as domain/mask pairs. A client holding two permissions in the LIC domain — masks 1 and 2 — gets a combined claim value of 3 (1 | 2 via bitwise OR). Checking whether that client has a specific permission is then a single bitwise AND operation: fast, compact, and the combined value fits in a single JWT claim regardless of how many permissions a domain contains.
In practice this means:
- Permission checks at request time are cheap — no database lookups, no list traversal
- Token payloads stay small even across many permissions
- Adding a new permission to an existing domain never requires changing the token structure — define a new mask, assign it, done
It also gives domain owners a clear mental model. Every permission has a name, a description, and an explicit mask value. Looking at a token claim, you know exactly what it authorizes.
Building on It: The Developer Experience
For a team that wants to expose a new internal route through the gateway, the work breaks into three steps.
1. Define the permission
Each permission gets a domain, a readable name, and a bitwise mask. New permissions in a domain just take the next bit:
// Each permission is a named bit within a domain
{
  domain: 'LIC',
  name: 'READ_REQUIREMENTS',
  mask: 1 << 0  // 1 — first bit
}
{
  domain: 'LIC',
  name: 'READ_ORDERS',
  mask: 1 << 1  // 2 — second bit
}
A client granted both permissions carries a single claim: LIC: 3. The gateway checks it with a bitwise AND — no lookup required.
2. Write the handler
Standard async route handler. The gateway attaches the decoded permission claims to the request so handler logic has full context if it needs it — though in most cases the permission check is already enforced before the handler runs.
3. Register the route with a permission guard
Route registration is where the permission contract is declared. A pre-validation hook runs before the handler — if the token doesn't satisfy the requirement, the request is rejected before any business logic executes:
// Conceptual route registration — implementation details vary by framework
server.get('/your-endpoint', {
  handler: yourHandler,
  preValidation: guardPermissions(['DOMAIN.PERMISSION_NAME'])
});
Multiple permissions can be required — all must be present for the request to proceed. The key point is that access control lives at registration, not inside the handler itself.
What It Unlocked
The most immediate win was visibility. Before this pattern, access to internal services was distributed and hard to audit. Now there's one place where access is defined, and one layer where it's enforced. When someone asks "who can call the licensing service?" — there's an actual answer.
Beyond that, teams gained independence. Adding a new externally-accessible route no longer requires a custom auth solution or a conversation about security tradeoffs every time. The framework handles auth and access control; the team focuses on the route logic.
And because permissions are first-class objects — named, described, and versioned — provisioning a new client is a deliberate, documented act. There's no ambiguity about what any given client is allowed to do.
There's still room to evolve: a self-service interface for client provisioning, tooling to visualize the permission graph across domains, more nuanced scope management. But the foundation holds. One gateway, consistent auth, no side doors — and a model any team can build on without reinventing the wheel.